Apple Push Notification Service (APNS)
How to create APNS Certificate
Creating an App ID :
Each iOS application that uses the APNs must have a unique application ID that uniquely identifies itself. In this step, you will learn how to create an App ID for push notification.
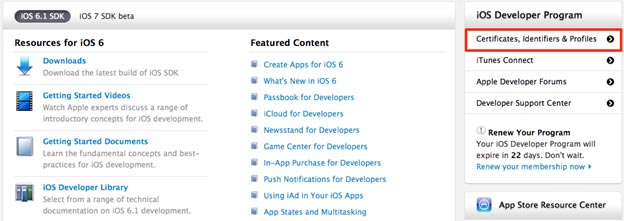
1.Log in to the iPhone Developer Connection Portal
2.Click on the iOS Provisioning Portal on the right of the page
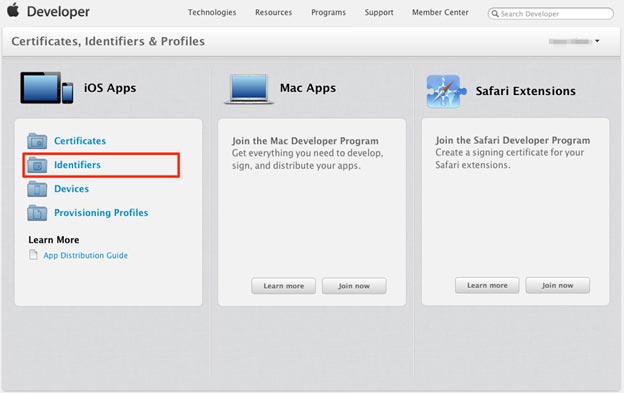
3.You should see the welcome page. Click on the Identifiers section to open the list with identifiers:
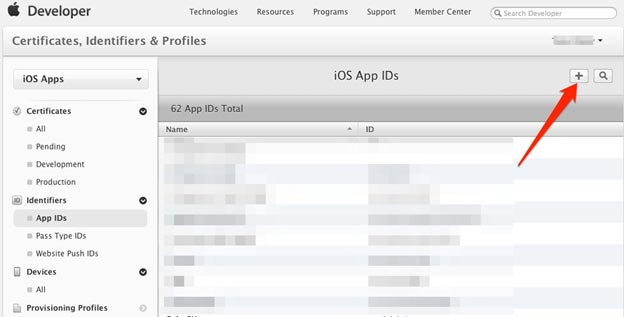
4.To make a new App ID open the App IDs tab and click on the New App ID button:
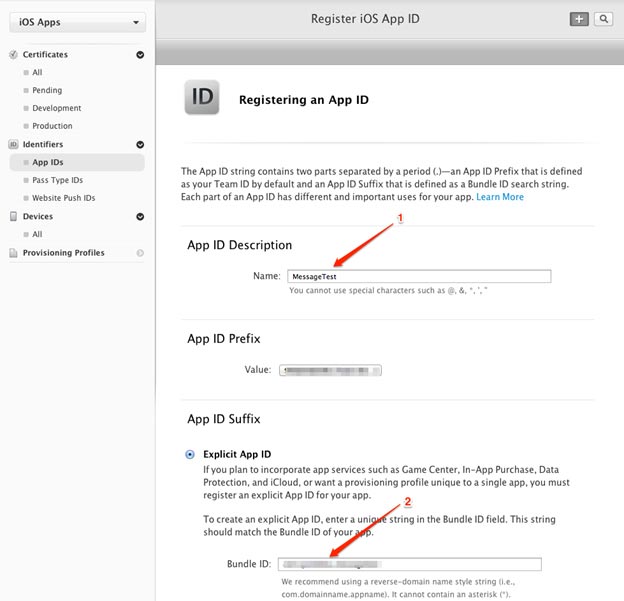
5.Enter your app name for the Description (1). Enter Bundle Identifier (2). Ensure you have created an App ID without a wildcard. Wildcard IDs cannot use the push notification service.
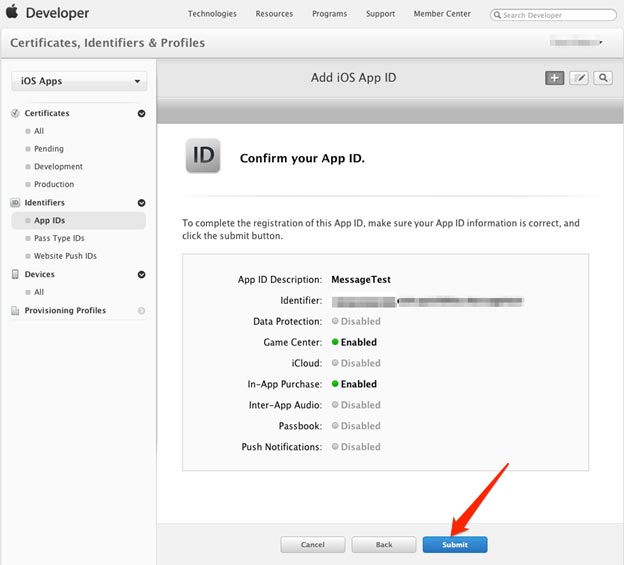
6.You should now see the info about App ID that you have created. Click Submit button to continue.
Generating a Certificate Request
You must generate a certificate request file so that you can use it to request for a development SSL certificate later on.
1.Launch the Keychain Access application in your Mac OS X:

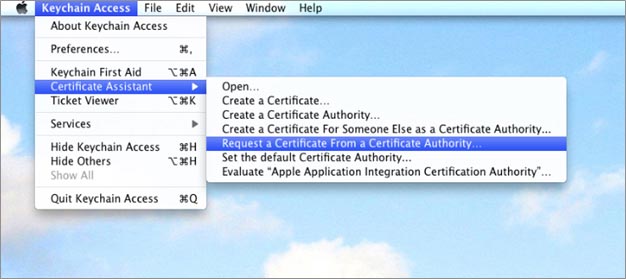
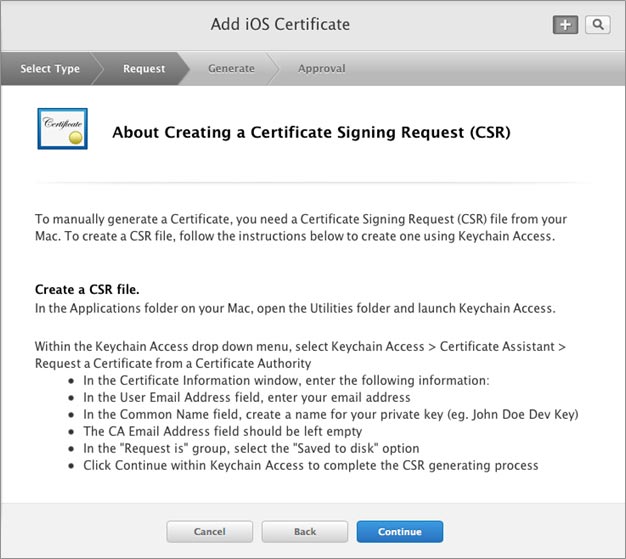
2.Select Keychain Access -> Certificate Assistant -> Request a Certificate From a Certificate Authority:
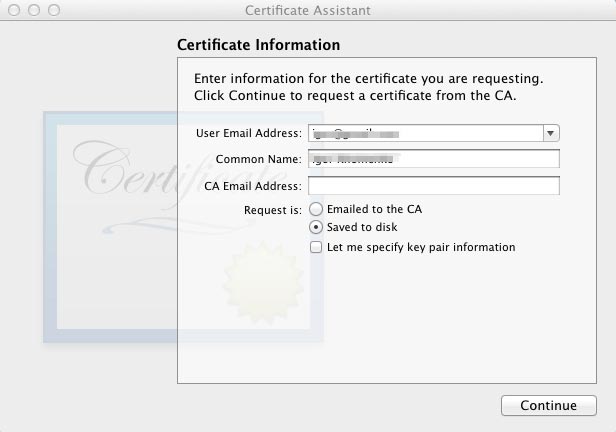
3.Enter the information required and check the 'Saved to disk' option. Click Continue:
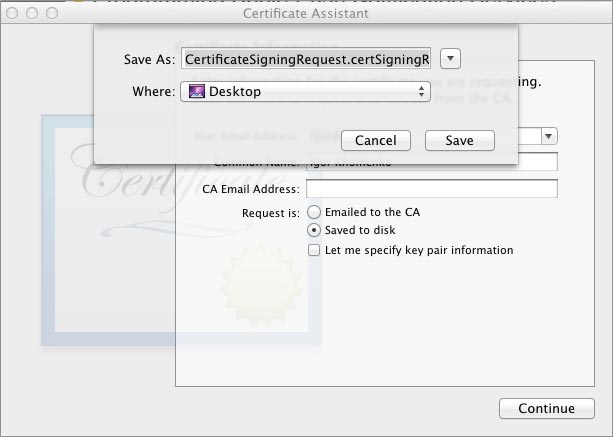
4.Save the certificate request using the suggested name and click Save. Click Done in the next screen:
5.The same process above applies when generating the production certificate.
Configuring an App ID for Push Notifications
Once an App ID is created, you need to configure it for push notifications.
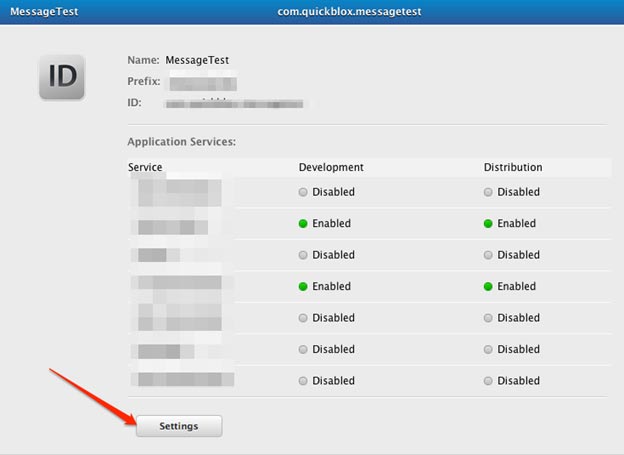
1.To configure an App ID for push notification, you need to select the App in the App IDs list and click on the 'Settings' button for the selected App ID:
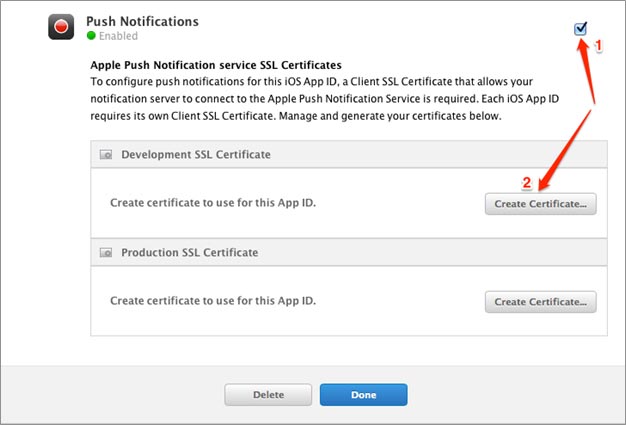
2.Configuration page opens. Scroll a page to the end, Check the 'Enable for Apple Push Notification service' option and click the 'Create Certificate' button displayed to the right of the Development Push SSL Certificate:
3.A wizard will appear. Click Continue:
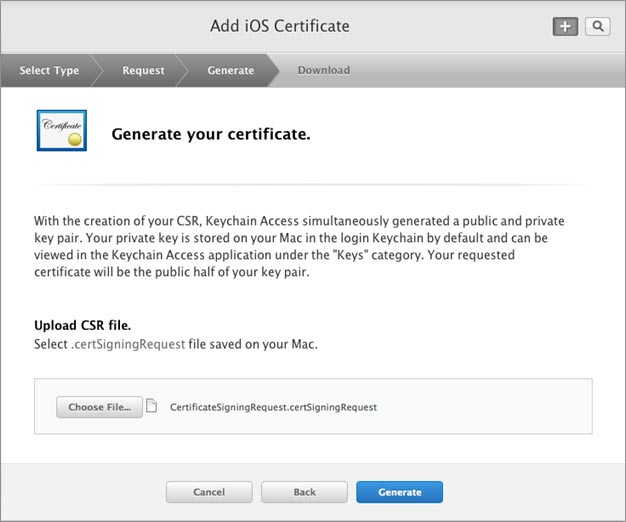
4.Click the Choose File button to locate the Certificate Request file that you have saved earlier (Generating a Certificate Request section). Click Generate:

5.Your SSL Certificate will now be generated. Click Done to continue:

6.The same process above applies when generating the production certificate.
Make APNS certificates
1.Now you can download certificate:
2.The SSL Certificate that you download is named aps_developer_identity.cer. Double-click on it to install it in the Keychain Access application. The SSL certificate will be used by your provider application so that it can contact the APNs to send push notifications to your applications.
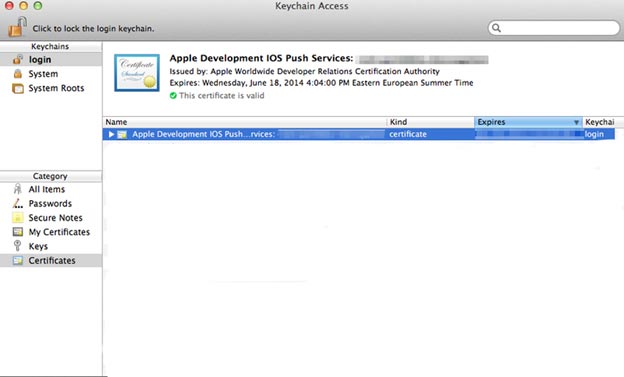
3.Launch Keychain Assistant from your local Mac and from the 'login' keychain, filter by the 'Certificates' category. You will see an expandable option called "Apple Development iOS Push.
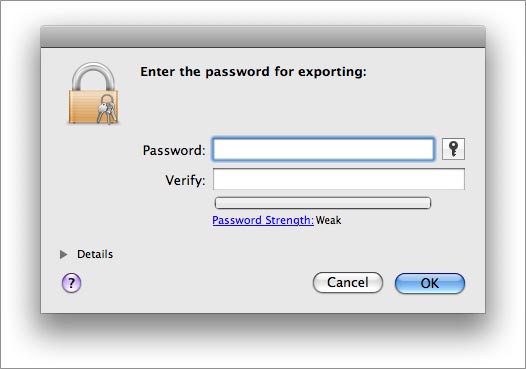
4.Expand this option then right click on "Apple Development iOS Push Services” -> Export "Apple Development iOS Push Services ...". Save this as apns-dev-cert.p12 file somewhere you can access it.
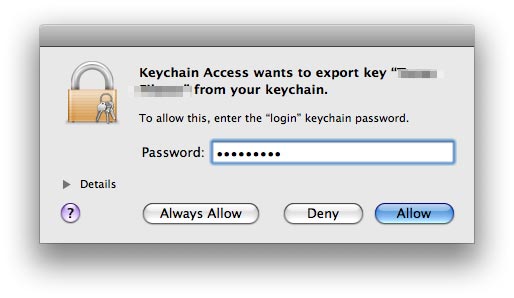
Enter your usual admin password for your computer to confirm and finalize the export process:
5.The same process above applies when generating the production certificate.
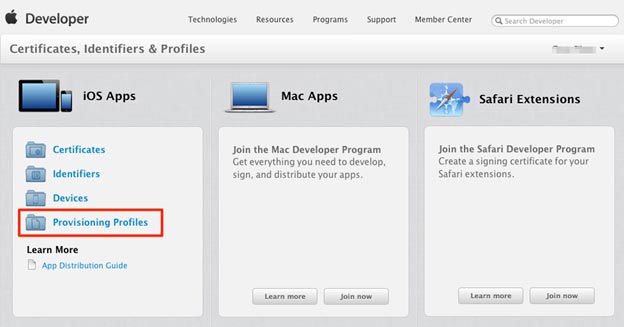
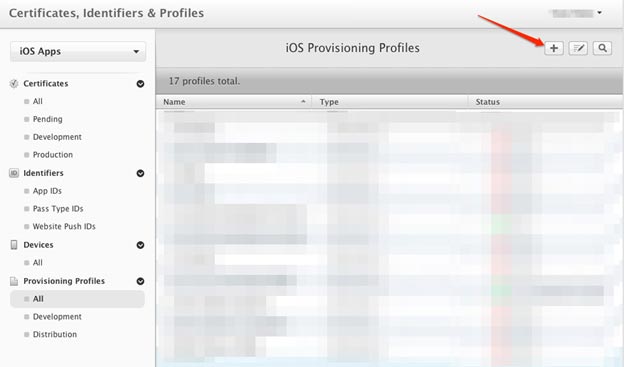
Create provision profile
1.Click on the Provisioning profiles tab in the iOS Apps module to create a provision profile:
2.Click on the 'Create a new provision profile' button:
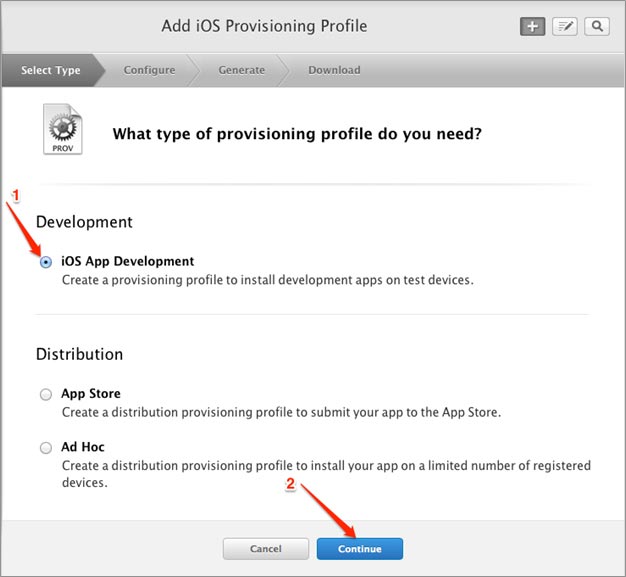
3.Select a type of the provisioning profile you need to create (1) and click on 'Continue' button to continue the creation:
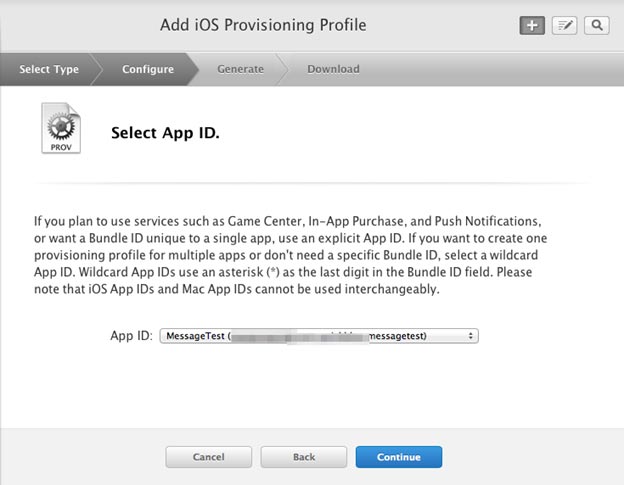
4.Select App ID you are creating the provisioning
profile for:
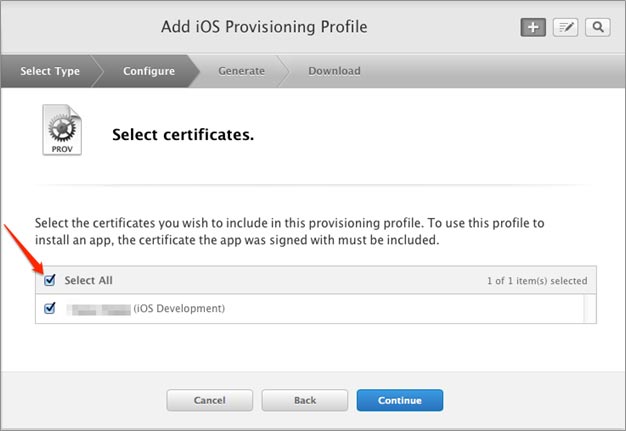
5.Select the certificates you wish to include in this
provisioning profile and click on 'Continue button':
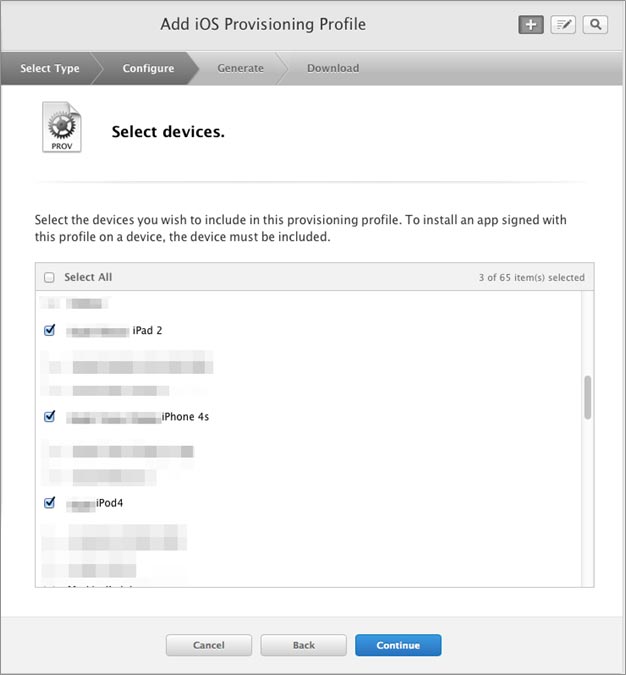
6.Select the devices you wish to include in this
provisioning profile and click on 'Continue' button:
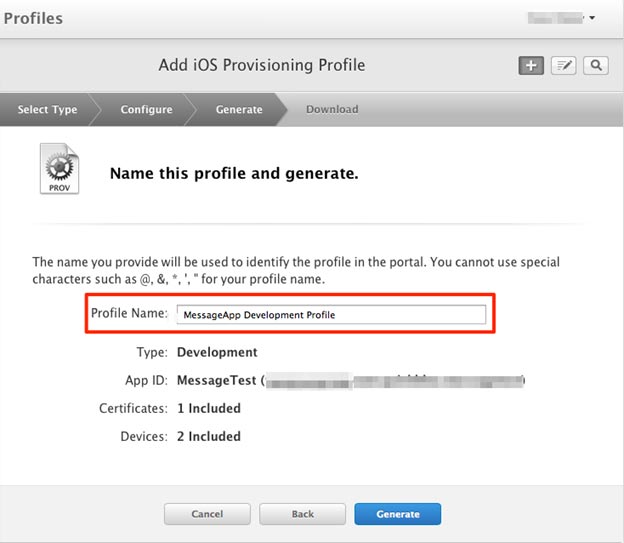
7.Input the Provisioning profile name and click on
'Generate' button to generate the profile:
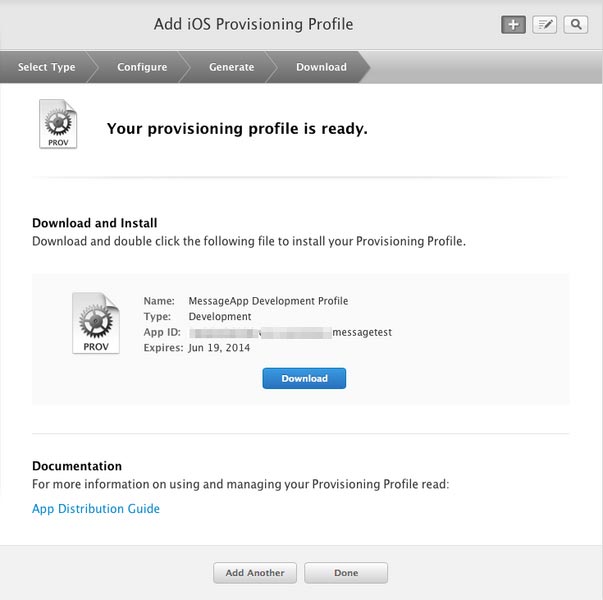
8.After the generating of the Provisioning Profile was
finished screen with the info and
9.available options appears. Click on 'Download' button
to download the Provisioning profile:
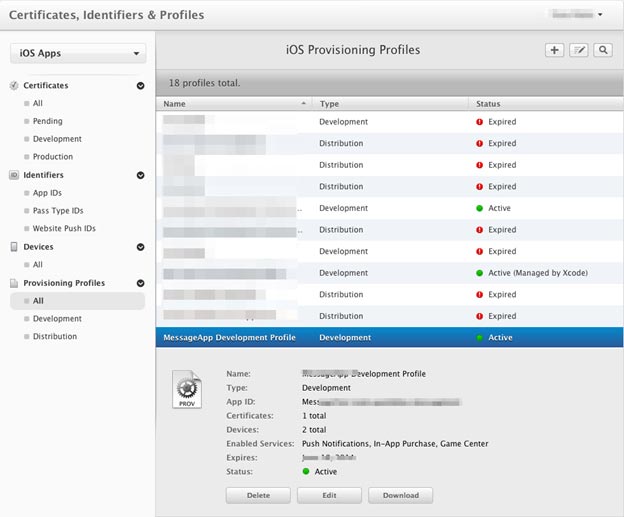
Also you can download the Provisioning profile later. Open a list
with all Provisioning profiles and choose the required. Additional
options become available:
10.After click on 'Download' button the Provision
profile will be downloaded to your hard disk.Double click on it
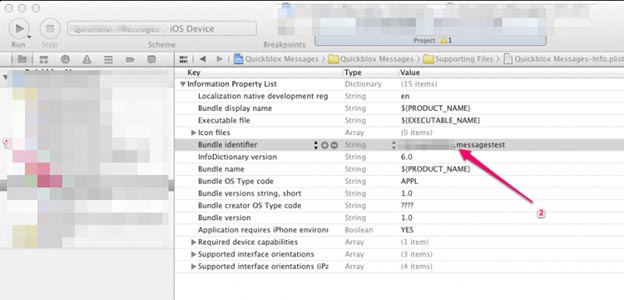
11.Open your application in Xcode, go to Project
structure, select *.plist file and write your Bundle identifier that you
type on Step 1
12.12. Go to Project Settings, choose your Target,
choose Code Signing and select your Provision Profile
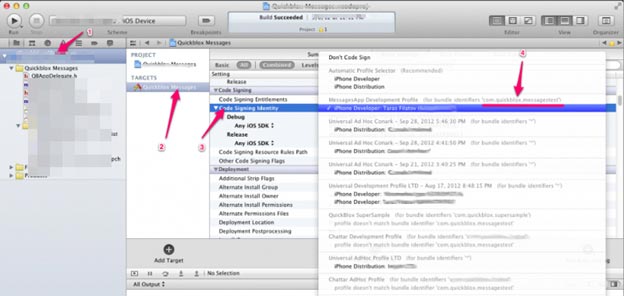
13.Now just run application! Thats all.


 Mr. Thomas Yoon
 +82-10-5380-0313