

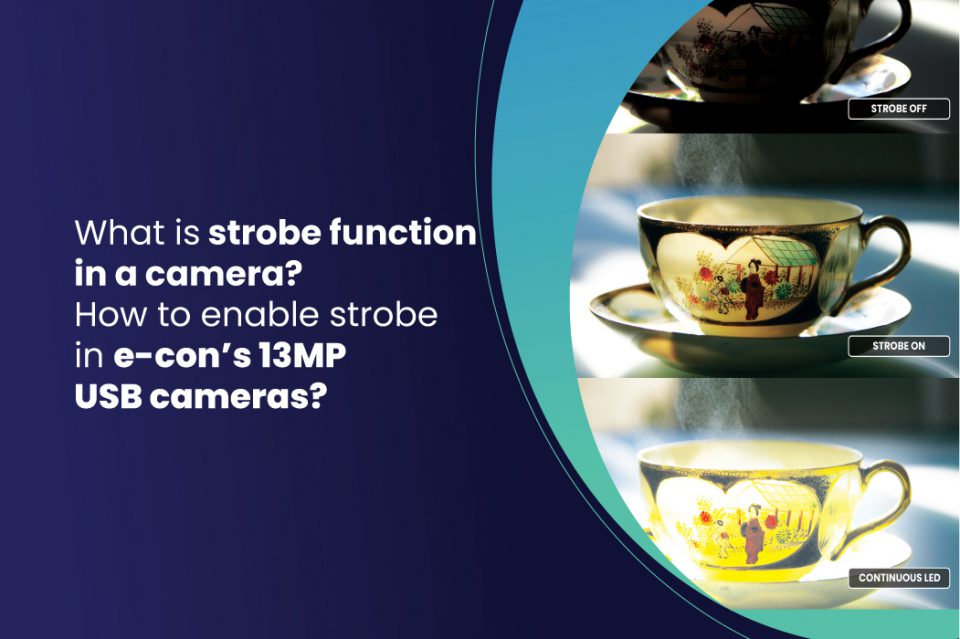
In embedded cameras, the strobe function is used to switch on and switch off external flashlights with an aim to optimize power consumption. The strobe function is important because in rolling shutter cameras it plays the role of determining when and for what duration the external light source should be kept ON. It is used to ensure that the scene is illuminated for proper exposure of objects and at the same time, the light doesn’t draw too much power from the system.
How does the strobe function work?
For a strobe-based trigger function to work, the conditions given below have to be met:
- Camera must be run in manual exposure mode.
- Exposure time must be the same as the total frame time. If it is lower, there will not be a moment when all the ROWs are being exposed, resulting in non-uniform exposure.
The strobe pulse width should be configured in a way that the signal is triggered before the exposure of the first row ends. To understand this, please have a look at the below illustration:

As you can see in the above image, the strobe pulse is initiated much before the exposure of the first row ends, and right when the exposure of the last row begins. Similarly, the flashlight is switched off right after the exposure of the first row ends. This ensures that the external light is switched on only for the minimum required duration – reducing power consumption.
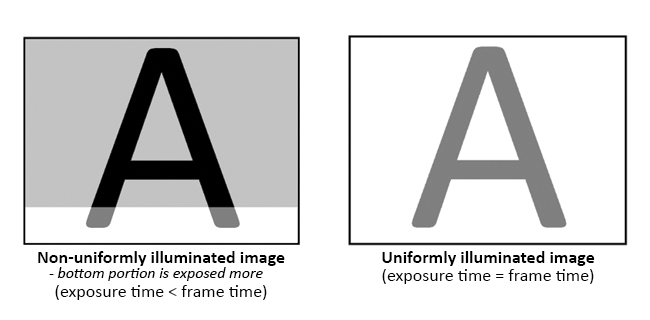
What happens when the exposure time is less than the frame time?
In the previous section, we learned that for the strobe function to work effectively, the exposure time has to be equal to the frame time. But why is this important?
If the exposure time is set to be lower than the frame time, the strobe width will not be able to cover the initial few rows of the frame. This will lead to non-uniform illumination resulting in partial loss of details in the output image. Have a look at the below illustration to understand this better:
Two methods of enabling strobe
There are two ways in which flash can be enabled in embedded camera systems.
- one where the strobe signal is given for every frame.
- and the other is the LED torch mode where the strobe signal is always made high independent of the exposure timings.
In the torch mode method, there is no question on strobe signal to frame synchronization. This is because the flash is on the whole time while the frame is exposed.
In the method where the strobe signal has to be initiated for every frame, there is a possibility that the entire frame or a part of the frame is exposed when the flash is off. This many a time results in strobe being out of sync with the frame.
Given these, the obvious questions that arise are:
- When should the strobe signal be triggered in order for the frame to be in sync
- What should be the exposure time and strobe width?
For the strobe signal given at the start of the exposure, the frame will be exposed depending on the width of the frame, and the strobe signal must be high for the last line of the frame to be exposed. This helps to limit the width of the strobe. Please have a look at Figure 1 given above to visualize this easily.
Enabling strobe in e-con’s AR1335-based 13MP USB cameras
Though strobe is a common feature in almost all rolling shutter cameras, it is important to configure it properly to operate the flashlight/LED source the right way. In this section, we will learn how this is done for the following cameras:
Both the cameras are based on the 13MP AR1335 sensor from onsemi. So we will be considering this sensor to understand how strobe works in these cameras.
In this sensor, each pixel row (3120 rows in total) exposes one after the other, with a temporal offset from one row to the next. At first, the top row of the image sensor starts receiving light. After a time offset, the next row starts collecting light. This results in a difference between the starting time of light collection for every row. However, the total light collection time for each row is the same. This is illustrated in the below image:
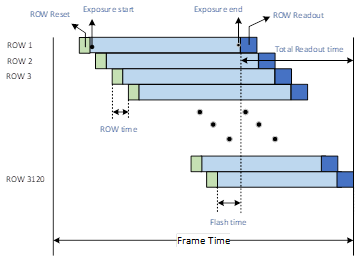
Here, the strobe pulse is generated when all the rows are being exposed. As shown in the above image, the flash time (or strobe width) is configured in a way that the data from all the rows are available at a time. The external set of LEDs can be toggled between every frame and the maximum frame rates (19Hz) can be achieved.
In addition to setting manual exposure, following are the parameters to be configured for strobe to function effectively in the AR1335 sensor:
- Exposure time should be set to ~52ms (equal to the frame time). If the exposure time is higher, the frame rate reduces (frame rate = 1/exposure time).
- The strobe pulse width is fixed to ~4ms for 13MP at 19 FPS.

Different modes of strobe available in e-con Systems cameras
All of e-con Systems’ rolling shutter cameras come with the strobe feature. In addition to the standard strobe mode, e-con also provides inverted strobe in a few sensors. This would mean that the signal will be active low. Strobe can also be given only for the first frame that comes after selecting the strobe mode. Another type of strobe that comes with many e-con cameras is enabling strobe only while taking images from the camera. In this mode, strobe will be initiated only once while taking the image either at the streaming resolution or from a different existing resolution in the camera (cross resolution).
Hope this article gave you an idea of what strobe is, its different types, and how it can be enabled for e-con Systems’ 13MP USB cameras. If you have any further queries on the topic, please leave a comment.
If you are looking for help in integrating cameras into your devices, please write to us at camerasolutions@e-consystems.com. To get a complete view of e-con’s camera portfolio, please visit our Camera Selector where you can browse through our cameras by features, interfaces, applications, etc.

Vinoth Rajagopalan is an embedded vision expert with 15+ years of experience in product engineering management, R&D, and technical consultations. He has been responsible for many success stories in e-con Systems – from pre-sales and product conceptualization to launch and support. Having started his career as a software engineer, he currently leads a world-class team to handle major product development initiatives