

Computer vision applications like smart surveillance, video conferencing, social distancing, and smart traffic systems are becoming more popular these days. But they don’t come easy since these applications require real-time streaming and AI processing – both of which have their challenges.
For instance, during real-time AI processing, the application faces a common problem of FPS drop that, in turn, can affect live streaming capabilities. It’s because computer vision involves processing every frame from real-time streaming. This can be a time-consuming process – causing many to skip the frames and lose the data.
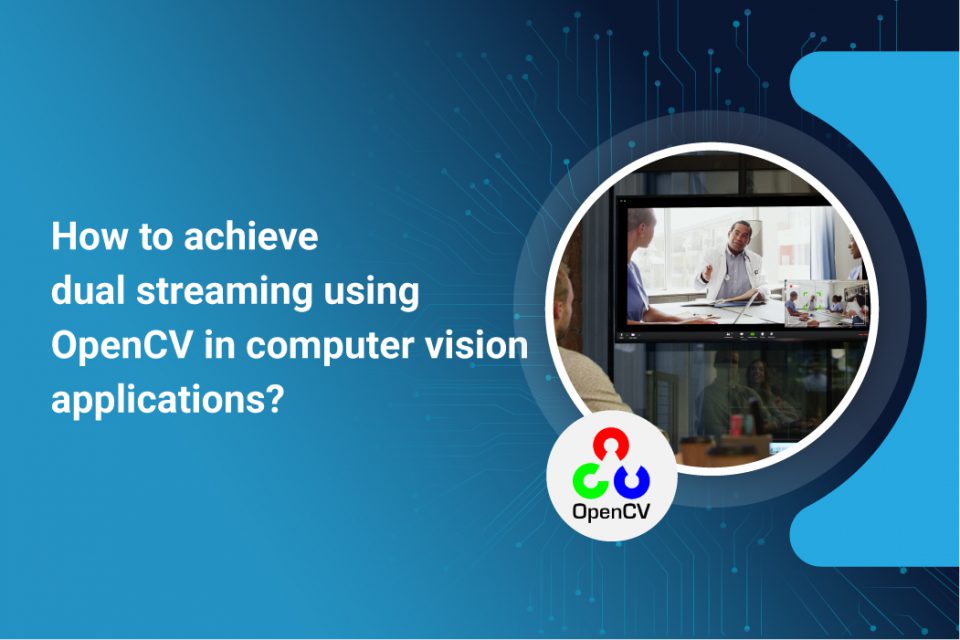
Hence, to overcome this problem, e-con Systems™ has designed e-CAM83_USB – a 4K HDR USB camera with dual node streaming. e-CAM83_USB is equipped with two video nodes so that one node can be used for live streaming without interruption while the other node handles the detection process. As a result, real-time streaming computer vision applications can leverage their multiprocessing or multithreading technique to continuously stream without FPS drop. We will learn more about the features of the product in a later section.
In this blog, let’s see how you can access two video nodes in a video conferencing application (using e-CAM83_USB or other camera modules). We will also learn how to achieve live streaming as well as detecting a speaker’s face – using OpenCV with a sample source code.
Enabling dual streaming for smart video conferencing
For the purpose of learning how dual streaming can be achieved, we will take smart video conferencing as a use case. With the help of OpenCV and Dlib face landmark, you can detect the speaker in a live video conferencing setup while displaying the detected person in a separate window. Using dual-stream video nodes with multiprocessing, you can easily identify the person talking without any FPS drop.
OpenCV and installation
OpenCV (Open Source Computer Vision Library) is a library of programming functions aimed at developing real-time computer vision applications. It is a great tool for image processing and can perform tasks like face detection, objection tracking, landmark detection, and more. OpenCV supports multiple languages including Python, Java, C++, etc.
In this sample application, you will be seeing how it works with Python. The Python library has hundreds of useful functions and algorithms – all freely available. Some of these functions are used in almost every computer vision task!
For this application, let’s use two-node H.264 and MJPEG formats. For streaming H.264, OpenCV should be installed from the source with Gstreamer enabled.
Here are the instructions to install Gstreamer with opencv in ubuntu – 18.04 // python 3.6:
sudo apt-get install gstreamer1.0*
sudo apt install ubuntu-restricted-extras
sudo apt install libgstreamer1.0-dev libgstreamer-plugins-base1.0-dev
sudo apt-get install build-essential
sudo apt-get install cmake git libgtk2.0-dev pkg-config libavcodec-dev libavformat-dev libswscale-dev
sudo apt-get install python-dev python-numpy libtbb2 libtbb-dev libjpeg-dev libpng-dev libtiff-dev libdc1394-22-dev
sudo apt-get install python3-pip python3-numpy
git clone https://github.com/opencv/opencv.git
cd opencv/
git clone https://github.com/opencv/opencv_contrib.git
mkdir build
cd build
cmake -D CMAKE_BUILD_TYPE=RELEASE \
-D CMAKE_INSTALL_PREFIX=/usr/local \
-D OPENCV_GENERATE_PKGCONFIG=ON \
-D OPENCV_EXTRA_MODULES_PATH=~/opencv/opencv_contrib/modules \
-D INSTALL_PYTHON_EXAMPLES=ON \
-D INSTALL_C_EXAMPLES=OFF \
-D PYTHON_EXECUTABLE=$(which python3) \
-D BUILD_opencv_python2=OFF \
-D PYTHON3_EXECUTABLE=$(which python3) \
-D PYTHON3_INCLUDE_DIR=$(python3 -c “from distutils.sysconfig import get_python_inc; print(get_python_inc())”) \
-D PYTHON3_PACKAGES_PATH=$(python3 -c “from distutils.sysconfig import get_python_lib; print(get_python_lib())”) \
-D WITH_GSTREAMER=ON \
-D WITH_GSTREAMER_0_10=ON \
-D BUILD_EXAMPLES=ON ..
sudo make -j4
sudo make install
sudo ldconfig
Dlib for face detection and recognition
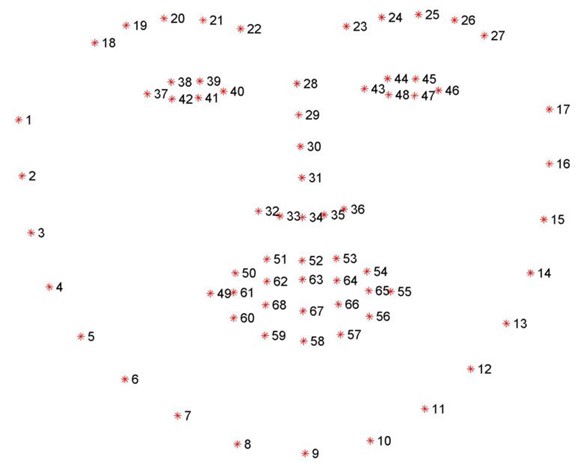
The dlib library is one of the most popular packages for face recognition. A Python package named “face recognition” encapsulates dlib’s face recognition functions into a convenient API. This facial detector comes with pre-trained models to estimate the location of 68 coordinates (x, y) that map the facial points on a human’s face. The following figure depicts these coordinates:
How the application works
Building a dual streaming solution for a video conferencing system to identify the speaker and display him/her on a separate window involves the following steps:
- Streaming two nodes in OpenCV
- Detecting the face
- Detecting the speaker
- Displaying the detected person
Let us look at each of them in detail.
Streaming two nodes in OpenCV
There are two nodes from the camera – while the H.264 node is used for continuously delivering the video stream, the MJPEG stream is used for processing. Here you can use multiprocessing to reduce the FPS drop.
Detecting the face
You can use Haar Cascades to identify the face from the MJPEG stream and pass it to Dlib for getting the 68 facial landmarks.
Detecting the person who is talking
After getting the 68 facial landmarks, you can easily detect whether a person is talking or not by calculating the Mouth Aspect Ratio (MAR).
To calculate MAR, first compute the euclidean distances between the two sets of vertical mouth landmarks (x, y)-coordinates by using the following methodology
A = dist.euclidean(mouth[2], mouth[10]) # 51, 59
B = dist.euclidean(mouth[4], mouth[8]) # 53, 57
compute the euclidean distance between the horizontal mouth landmark (x, y)-coordinates
C = dist.euclidean(mouth[0], mouth[6]) # 49, 55
compute the mouth aspect ratio
Once you derive the values for A, B, and C, MAR can be calculated as follows:
MAR = (A + B) / (2.0 * C)
Displaying the detected person
Once MAR is calculated, the threshold value is fixed to detect the person who is talking, and the coordinates of the person talking is identified. Then, the image can be cropped and resized for displaying by using multiprocessing.
Source code for dual streaming configuration
To download the source code for the sample application discussed above, please visit this link.
e-CAM83_USB – Enabling new-age computer vision experiences with dual streaming
e-CAM83_USB from e-con Systems™ is a SONY-based 4K HDR USB high-speed camera with dual-stream support to simultaneously receive two streams with different resolutions. In addition, this camera’s HDR capability helps capture superior images without data loss – even in the most challenging lighting conditions.
Based on the Sony IMX317, a 1/2.5″ sensor, e-CAM83_USB has a powerful high-performance ISP – providing high-quality images with Auto White Balance (AWB), Auto Gain Control, and Auto Exposure functions.
Please watch the below video to learn more about the features and applications of e-CAM83_USB.
Need more information on this best-fit video conferencing camera? Check out our FAQs.
If you need help selecting an ideal video conferencing camera solution – no matter your application, please write to us at camerasolutions@e-consystems.com. You can also visit our Camera Selector to get a full view of e-con Systems’ camera portfolio.

Vinoth Rajagopalan is an embedded vision expert with 15+ years of experience in product engineering management, R&D, and technical consultations. He has been responsible for many success stories in e-con Systems – from pre-sales and product conceptualization to launch and support. Having started his career as a software engineer, he currently leads a world-class team to handle major product development initiatives