

LabVIEW is a graphical programming environment for engineers to develop automated research, validation, and production test systems. It has all the features to build an automated test system with ease and speed. As a result, LabVIEW has gained popularity – thanks to its thousands of analysis functions, configurable, interactive display elements, and drivers for automating every instrument and data acquisition hardware.
e-con Systems’ USB cameras can be easily integrated with NI LabVIEW and NI Max app as they are UVC compliant. In this blog, you’ll discover the steps to achieve this without facing any hassles.
Different versions of LabVIEW
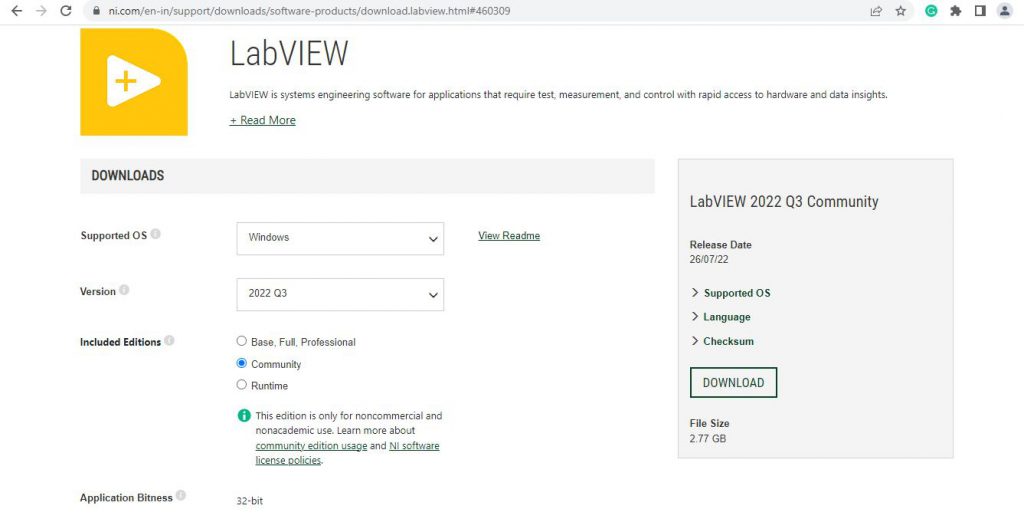
LabVIEW has three versions – Base, Community, and Run-time. We have tested our cameras on a Windows PC with LabVIEW 2022 Q3 version (Community version) 32-bit, which comes with free access for a full year.
We have also provided a YouTube tutorial video that you can refer to unearth all the necessary details.
First, please create an account in LabVIEW and sign in using the same credentials. Then, you can download the community version here: https://www.ni.com/en-in/support/downloads/software-products/download.LabVIEW.html#460309
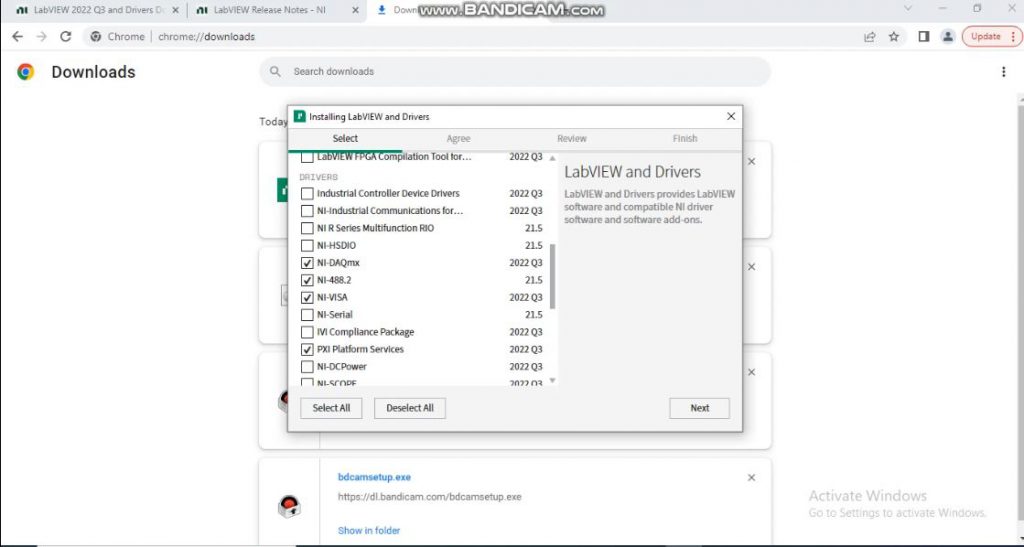
Click on Download and install the LabVIEW NI Package Manager. Initially, you can download all the required software and drivers from the package manager, Open the Package manager and install the following software and drivers.
LabVIEW,Vision developement module,NI-DAQmx, NI-488.2, NI-VISA, PXI Platform services, NI-Sync, NI-IMAQ, NI-IMAQdx, NI-IMAX I/o, JKI VI PACKAGE MANAGER.
Install all the packages mentioned above and their associated packages by clicking next and following the steps. You will be prompted between the installation with the ‘activate software’ window and the ‘license manager’ window- in which you can use your LabVIEW credentials to activate. Some drivers will be provided limited-time access to the Community version (45 Days). Failure to activate the license will result in problems accessing or using the drivers for vision acquisition.
You can access LabVIEW Package manager and License manager from your PC if you need to install additional drivers and software.
Reboot your PC once all the installation has been completed. Following these steps will result in installing the required LabVIEW Drivers like Vision and Motion, as well as software such as the NI Max app to work with our USB cameras.
How to work with the NI Max app
Connect our camera to the PC and Open the NI Max app. Under the devices and interface menu on the top left, the camera is displayed with the name. Click on it and Click Grab to get the stream from the camera. Right-click the stream and select zoom to fit from the viewer tools for a full-screen view. You can stream only in the camera’s default supported resolution. You may encounter errors while streaming in custom resolution. So, change it to a supported resolution to work properly.
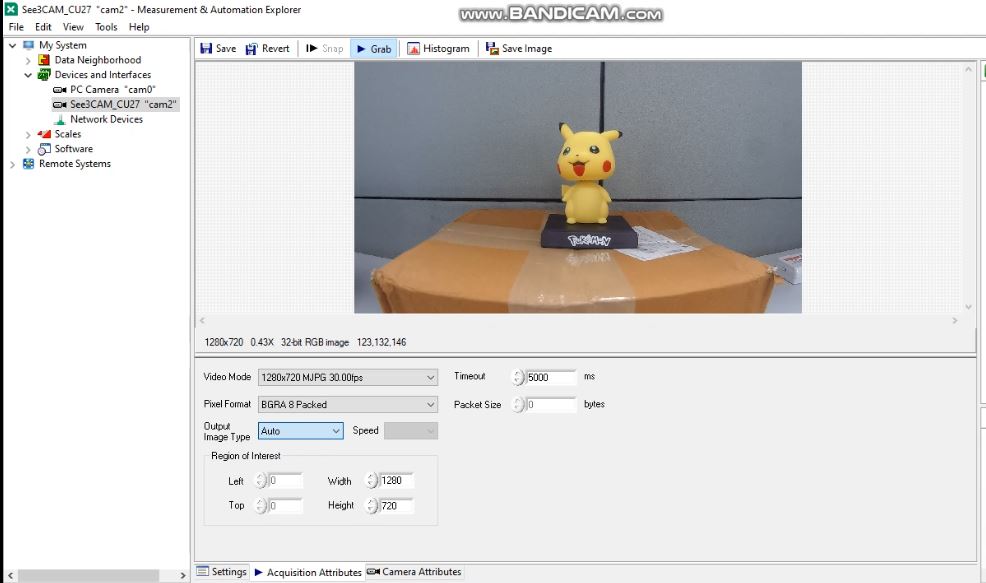
You can change the resolution, and its supported FPS in the Acquisition Attributes tab. In the camera attributes tab, you can change the UVC controls like brightness, contrast, exposure, gain and a few other controls with both default value and a slider to adjust the value. Try changing the value instead of the slider, as drastic slider movement may cause the application to crash. Click on ‘save image’ to capture an image during streaming.
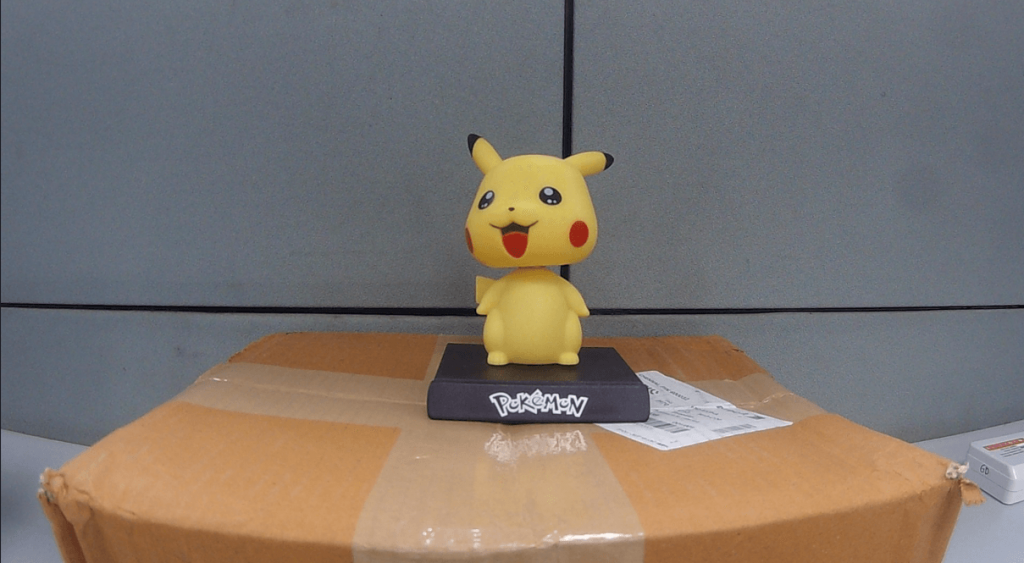
Please find the sample color image captured using the NI Max app.
Our monochrome cameras require additional filters to be installed to work with the NI Max app and LabVIEW. So, install the e-CAMView – our windows camera application that provides you with the additional filters installed in your PC, which is required for the monochrome cameras. After the installation, you can use the monochrome cameras in the NI Max app and LabVIEW without any hindrance.
Here’s the link to download e-CAMView here: https://www.e-consystems.com/e-CAMView-Windows-camera-streaming-app.asp#Download
Here’s the sample monochrome image captured using the NI Max app:

How to work with LabVIEW
Connect your camera, open LabVIEW, click on a new project, and select blank VI project. It will enable two windows: the front panel and the block diagram. Right-click on the block diagram, where you can find multiple functions that can be dragged and dropped on the screen. One such is the Vision and Motion function.
Vision and Motion functions acquire, process, and save images from the camera. Some of the features will be disabled until the license is activated, as mentioned earlier.
You must drag and drop the Vision Acquisition block from the Vision Express tab under the Vision and Motion function.
It will enable a NI Vision acquisition express window to choose the preexisting requisites for image acquisition. Then, select the camera and click on Grab to see the preview.
Click Next and select the acquisition type based on your requirement from the four available acquisitions.
Change the UVC controls (if needed) and provide the image-saving path in the next step by enabling image logging. Click Next and select the UVC controls to be enabled for changing the image parameters.
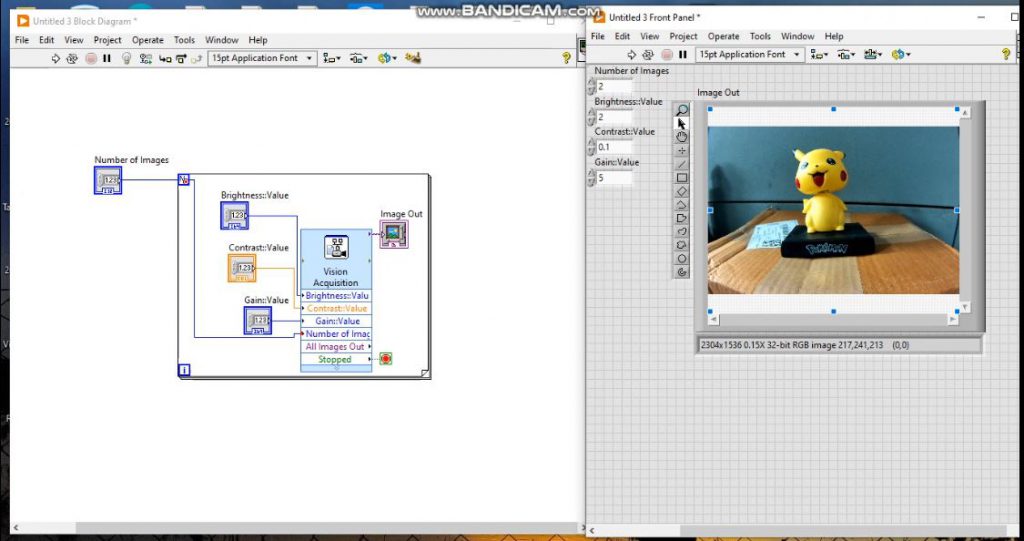
Then, click Finish to create an image acquisition block with the camera controls, the number of images needed to be taken and an image display to display the streaming. Right-click on each control and select create control to adjust the values if needed.
Click on Run to acquire the images and stop the acquisition once complete.
 You can find the images saved in the path you have provided.
Conclusion
LabVIEW is easy to use, with pre-defined blocks that can be readily used to test your prototyping stage without investing in physical components. It saves costs and time by speeding up your turnaround time in your development phase. In this blog, we have just shared the initial steps for installing LabVIEW and its prerequisites to stream the camera and save an image. It’s important to know that its application is limitless – and you can certainly explore it by browsing online resources.
Please find the resource link for Vision and Motion functions:
Don’t forget to check out the YouTube video link at the end of the blog to learn more!
You can also check out e-con Systems’ Camera Selector page to go through our entire camera portfolio here: https://www.e-consystems.com/camera-selector.asp

Vinoth Rajagopalan is an embedded vision expert with 15+ years of experience in product engineering management, R&D, and technical consultations. He has been responsible for many success stories in e-con Systems – from pre-sales and product conceptualization to launch and support. Having started his career as a software engineer, he currently leads a world-class team to handle major product development initiatives