As our USB cameras are UVC compatible, we can just plug in to any Windows XP, Windows 7 running PC and start using the camera with the simple GraphEdit tool.
In this blog I am going to walk through the steps required to record a video from the USB camera using a GraphEdit.
- Download the GraphEdit tool(http://www.videohelp.com/download/graphedit10-090724.zip )
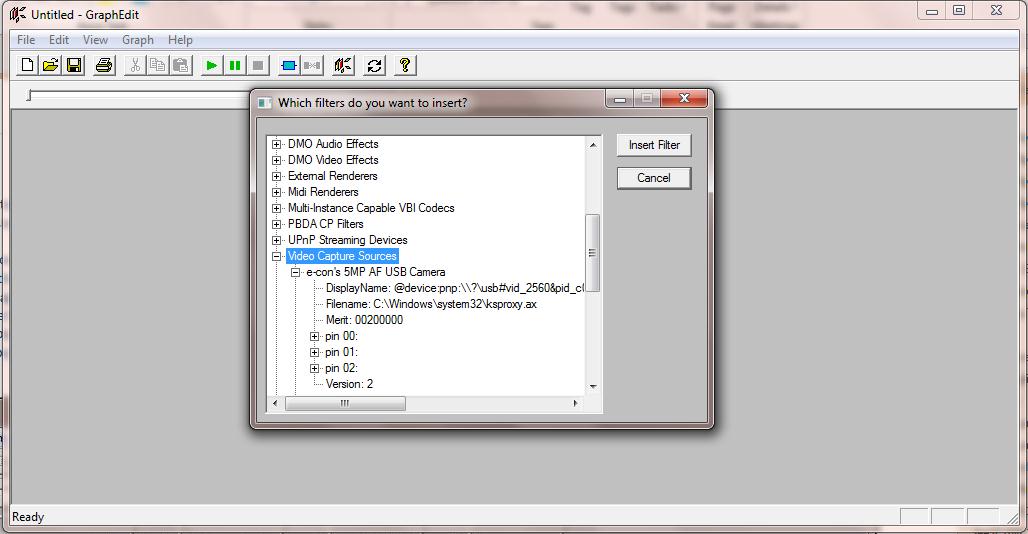
- Open the Filters dialog using “Graph MenuàInsert Filters”. In the dialog Select our e-con 5MP Camera from the “Video Capture Source filters”. Click on “Insert Filter” button.
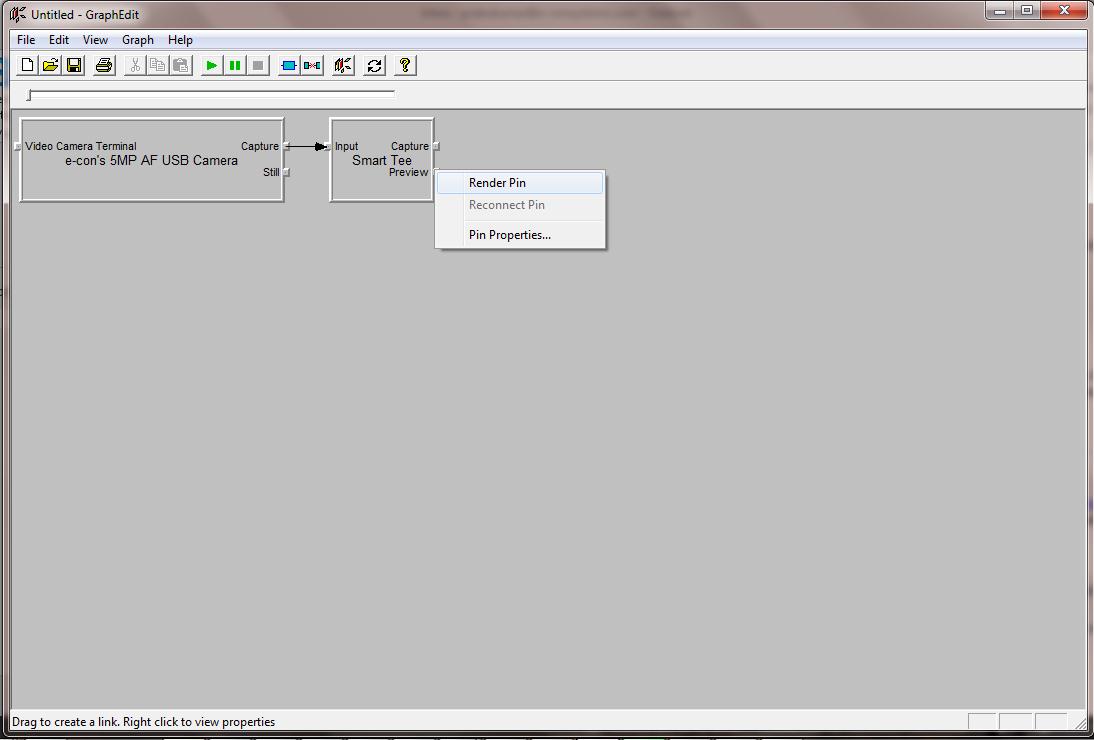
- Add the TEE filter in order to render the preview as well as record the same to a file by choosing “DirectShow FiltersàSmart Teeà Insert Filters”.
- Now render the Preview pin by right clicking and selecting the “Render Pin”.
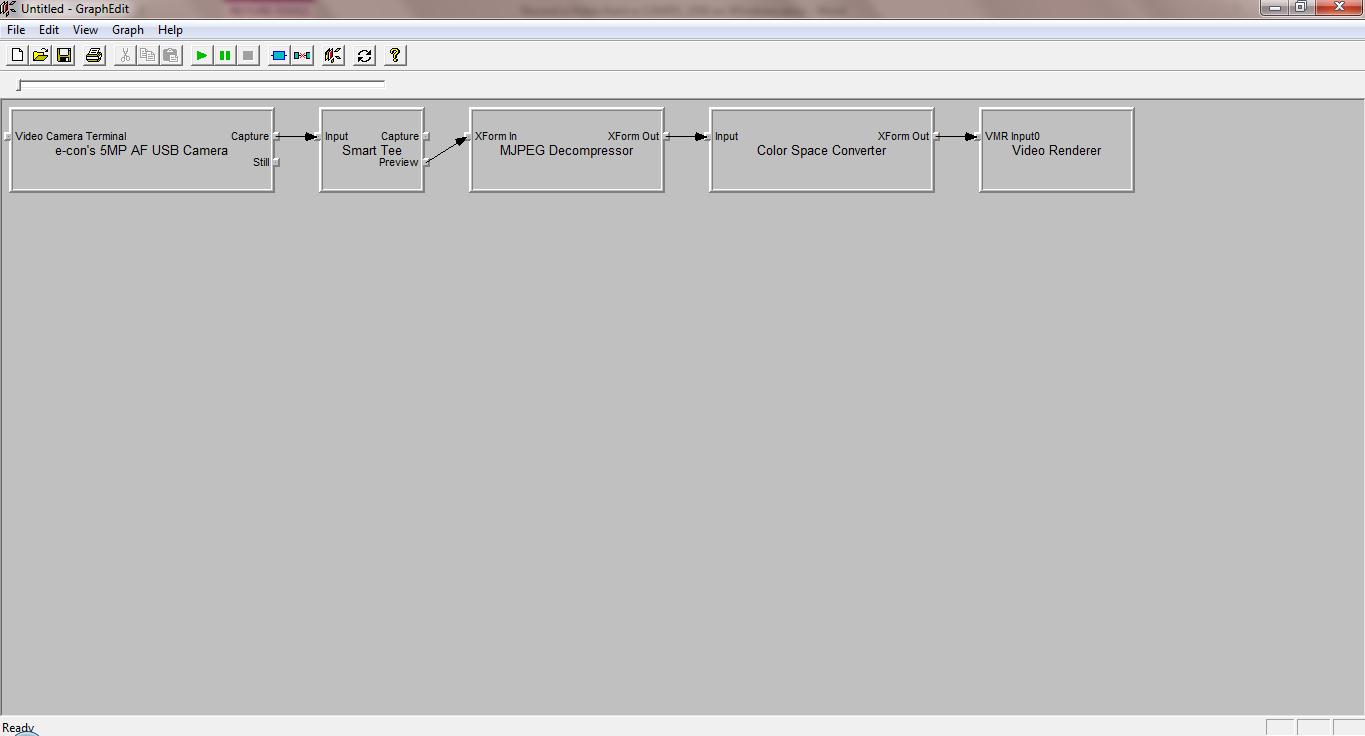
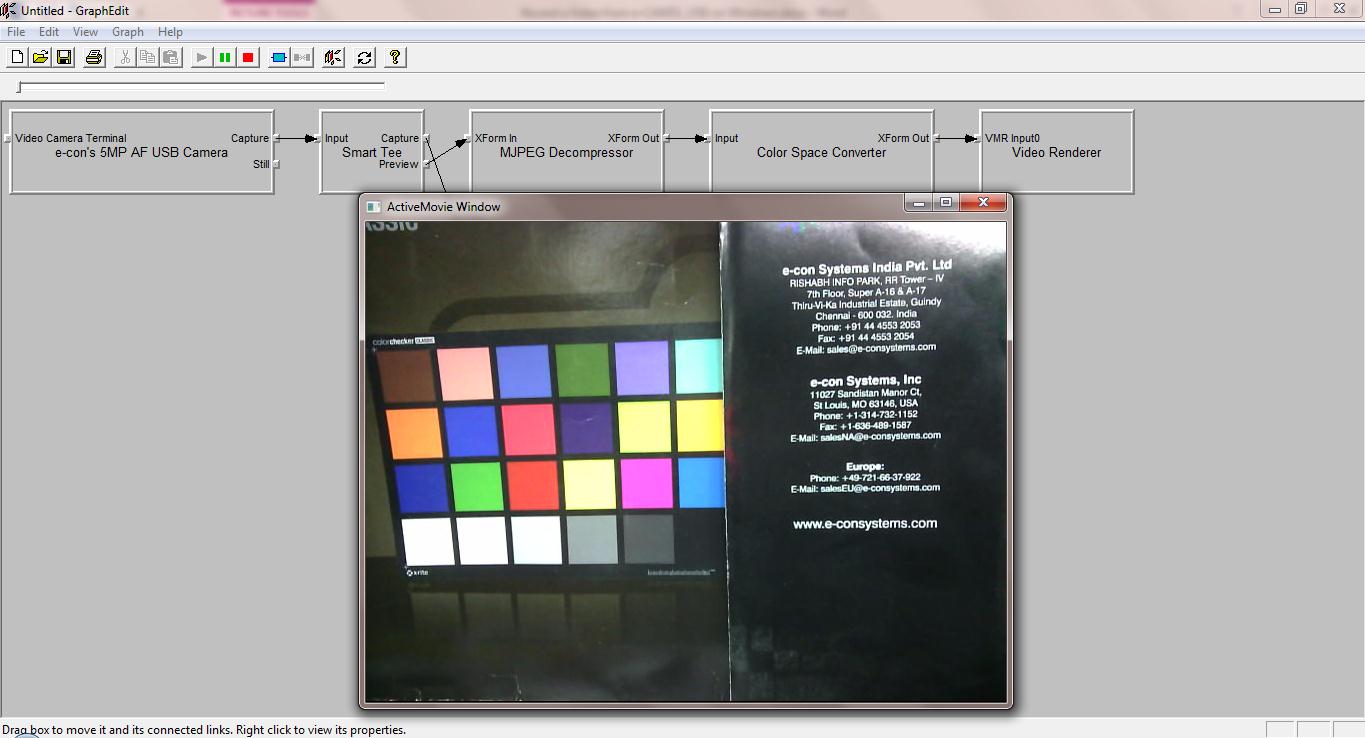
- Now the filters which are required for the Preview is automatically added as below.
- For the Capture pin insert two more filters from the DirectShow Filters list.
- Avi Mux Filter
- File Writer– While adding this filter specify the file name of the video to be stored on disk.
- After adding the above filters to the filter graph, connect the pins as shown below in the picture.
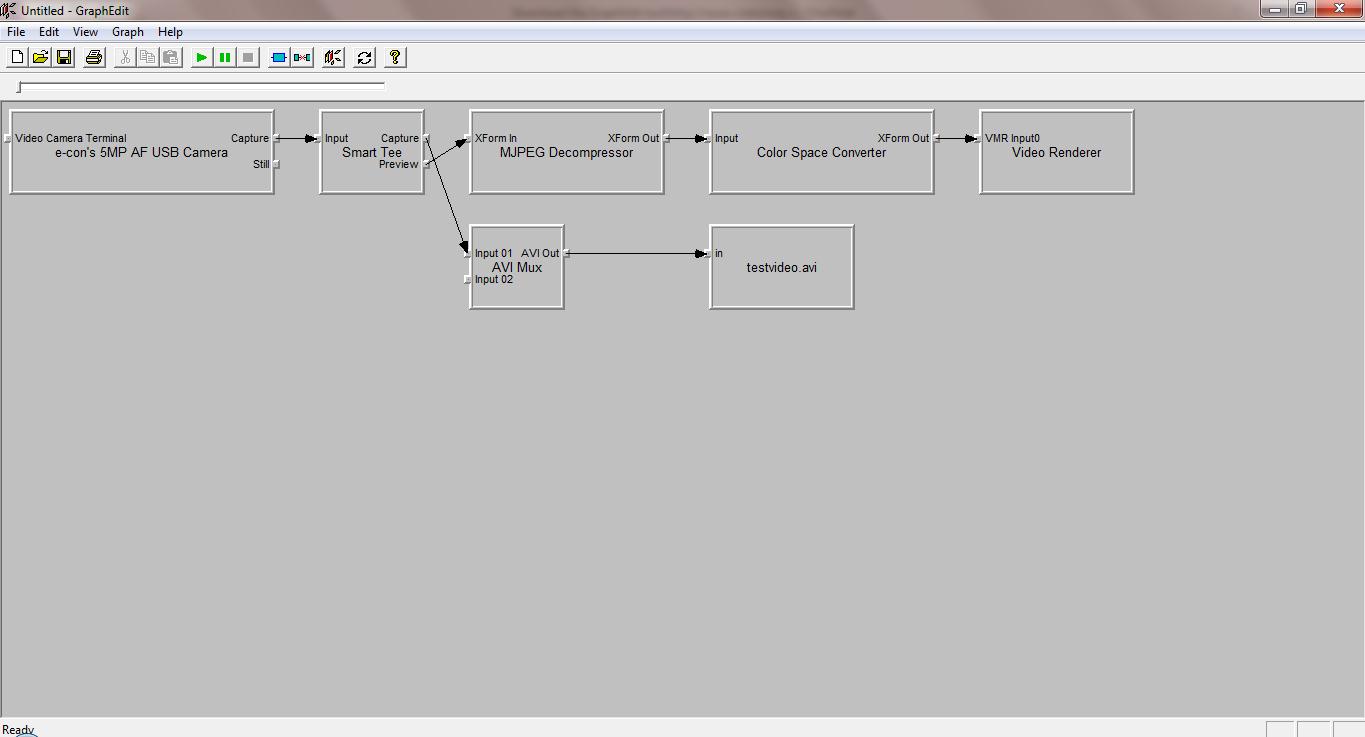
- Now start the graph by “Graph Menu à Play”. It will record to the “testvideo.avi” file which is stored on the disk. Also it will show the preview of the same on the ActiveWindow.
- Once we stop the graph by “Graph MenuàStop”, we will be able to playback the recorded file ”testvideo.avi” using VLC player.
Resolution Change:
-
- If we want to record at desired resolution (say for ex: 5MP MJPEG), we can switch the resolution before starting the graph. By right clicking on the “capture pin” of the e-con 5MP Camera, select the resolution as 2592×1944 and format as MJPEG. Click Ok and close the dialog.
For more information visit e-CAM51 USB Board Camera product page.

Prabu is the Chief Technology Officer and Head of Camera Products at e-con Systems, and comes with a rich experience of more than 15 years in the embedded vision space. He brings to the table a deep knowledge in USB cameras, embedded vision cameras, vision algorithms and FPGAs. He has built 50+ camera solutions spanning various domains such as medical, industrial, agriculture, retail, biometrics, and more. He also comes with expertise in device driver development and BSP development. Currently, Prabu’s focus is to build smart camera solutions that power new age AI based applications.


